Before you’re ready to send your WordPress transactional email, you need to connect InboxWP with your website. It has a series of steps to complete the entire connection procedure.
After you’ve installed the InboxWP plugin, you’ll see all the options in the sidebar.
Let’s see how to connect InboxWP with your WordPress site –
Connect InboxWP with your WordPress site
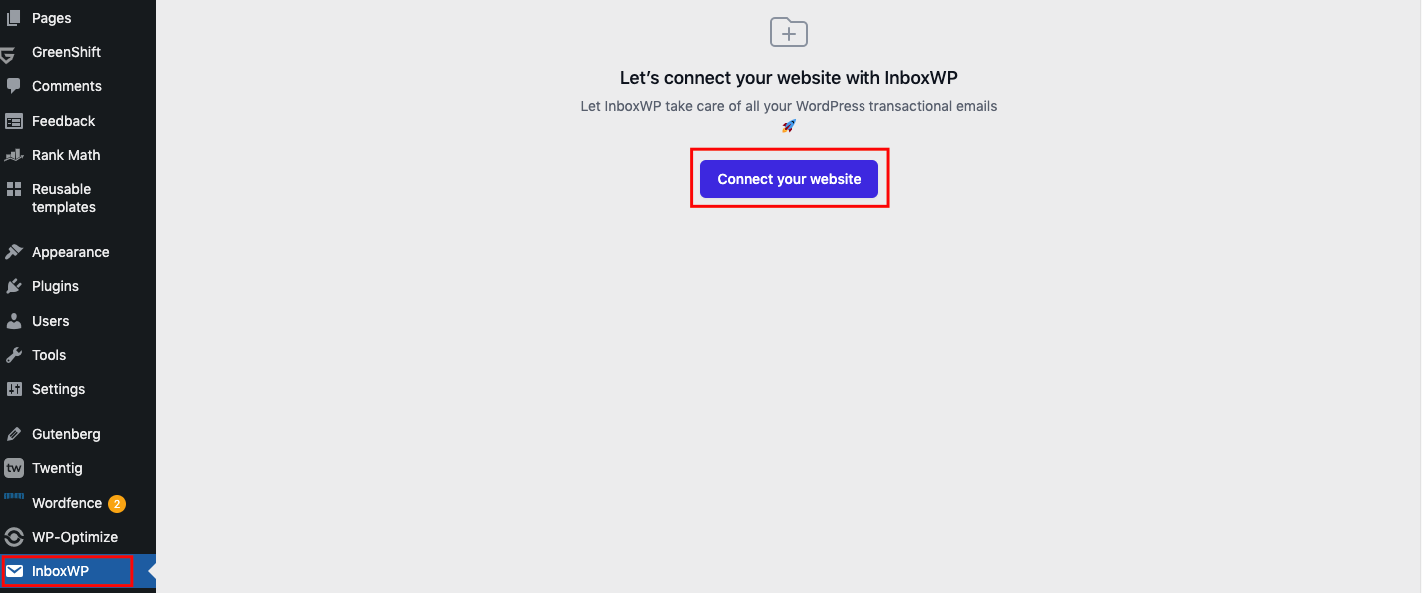
Click on InboxWP from your dashboard, and you’ll be requested to “Connect your website”
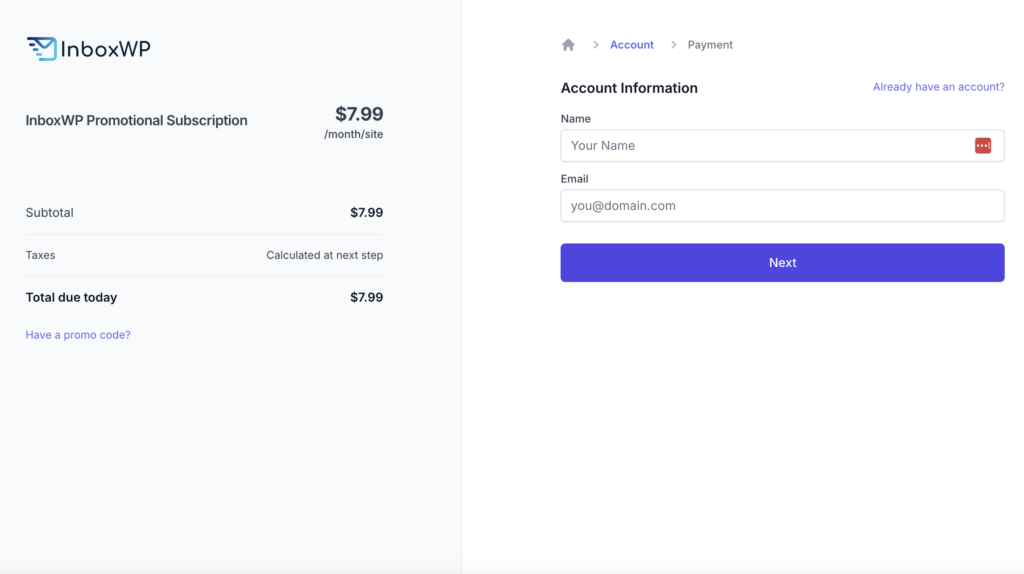
After you click the “Connect your website” button, you’ll be redirected to the subscription page to complete the checkout process.
Here, you can see the total price of the subscription. Provide your account information to go to the next step.
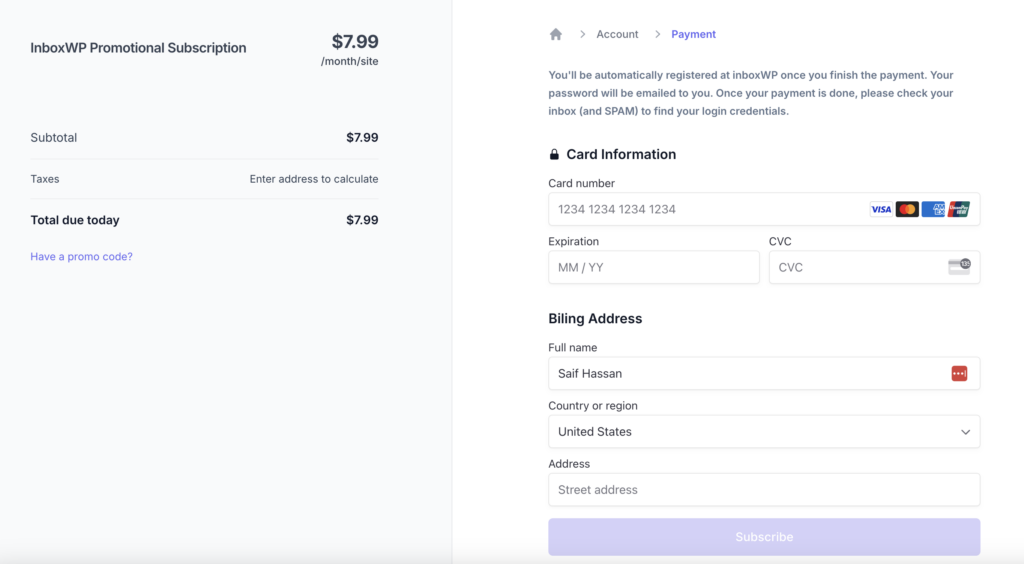
Now fill out the billing option with the proper information and details. Once done, click on the “Subscribe” button to move forward.
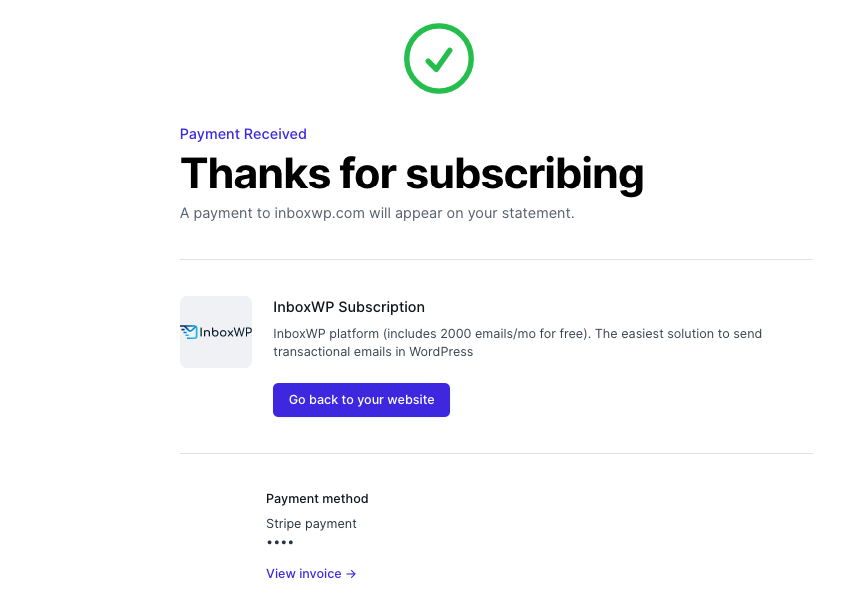
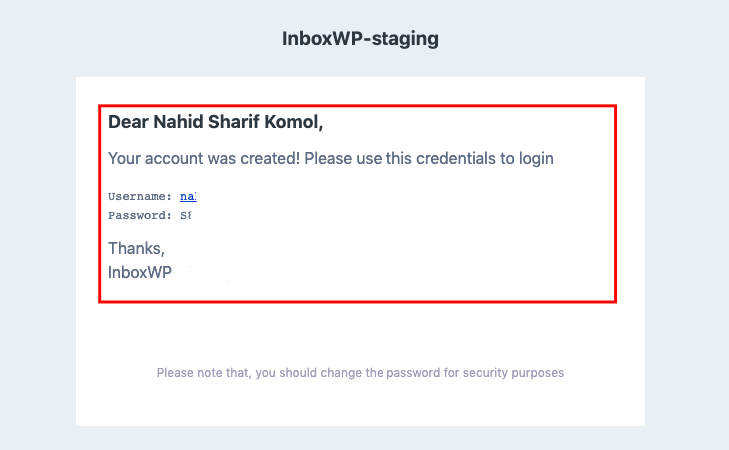
InboxWP configuration should be successful after you finish the payment. Your login credential will be sent to the email that you gave while completing the billing.
Well, you have successfully subscribed to the InboxWP subscription 🎉 And now you’re ready to send your first WordPress transactional email.
App Credentials
You’ll also get your credentials emailed after signing up at InboxWP.
Now head to your WordPress dashboard by clicking on “Go back to your website”.
We hope this documentation helps you learn how to connect InboxWP to your WordPress site. If you face any problems, feel free to share them with us through our support.